


OAuth
OAuth is an industry-leading authorization framework designed to grant users secure access to resources without sharing their credentials.
Widely adopted by major tech companies and embraced across various applications, OAuth has revolutionized the way users interact with web and mobile services.
OAuth authentication seamlessly integrate with third-party services while keeping sensitive information safe.
Use the flexibility and user-centric nature of OAuth, where users can conveniently grant access to their data without compromising their login credentials.
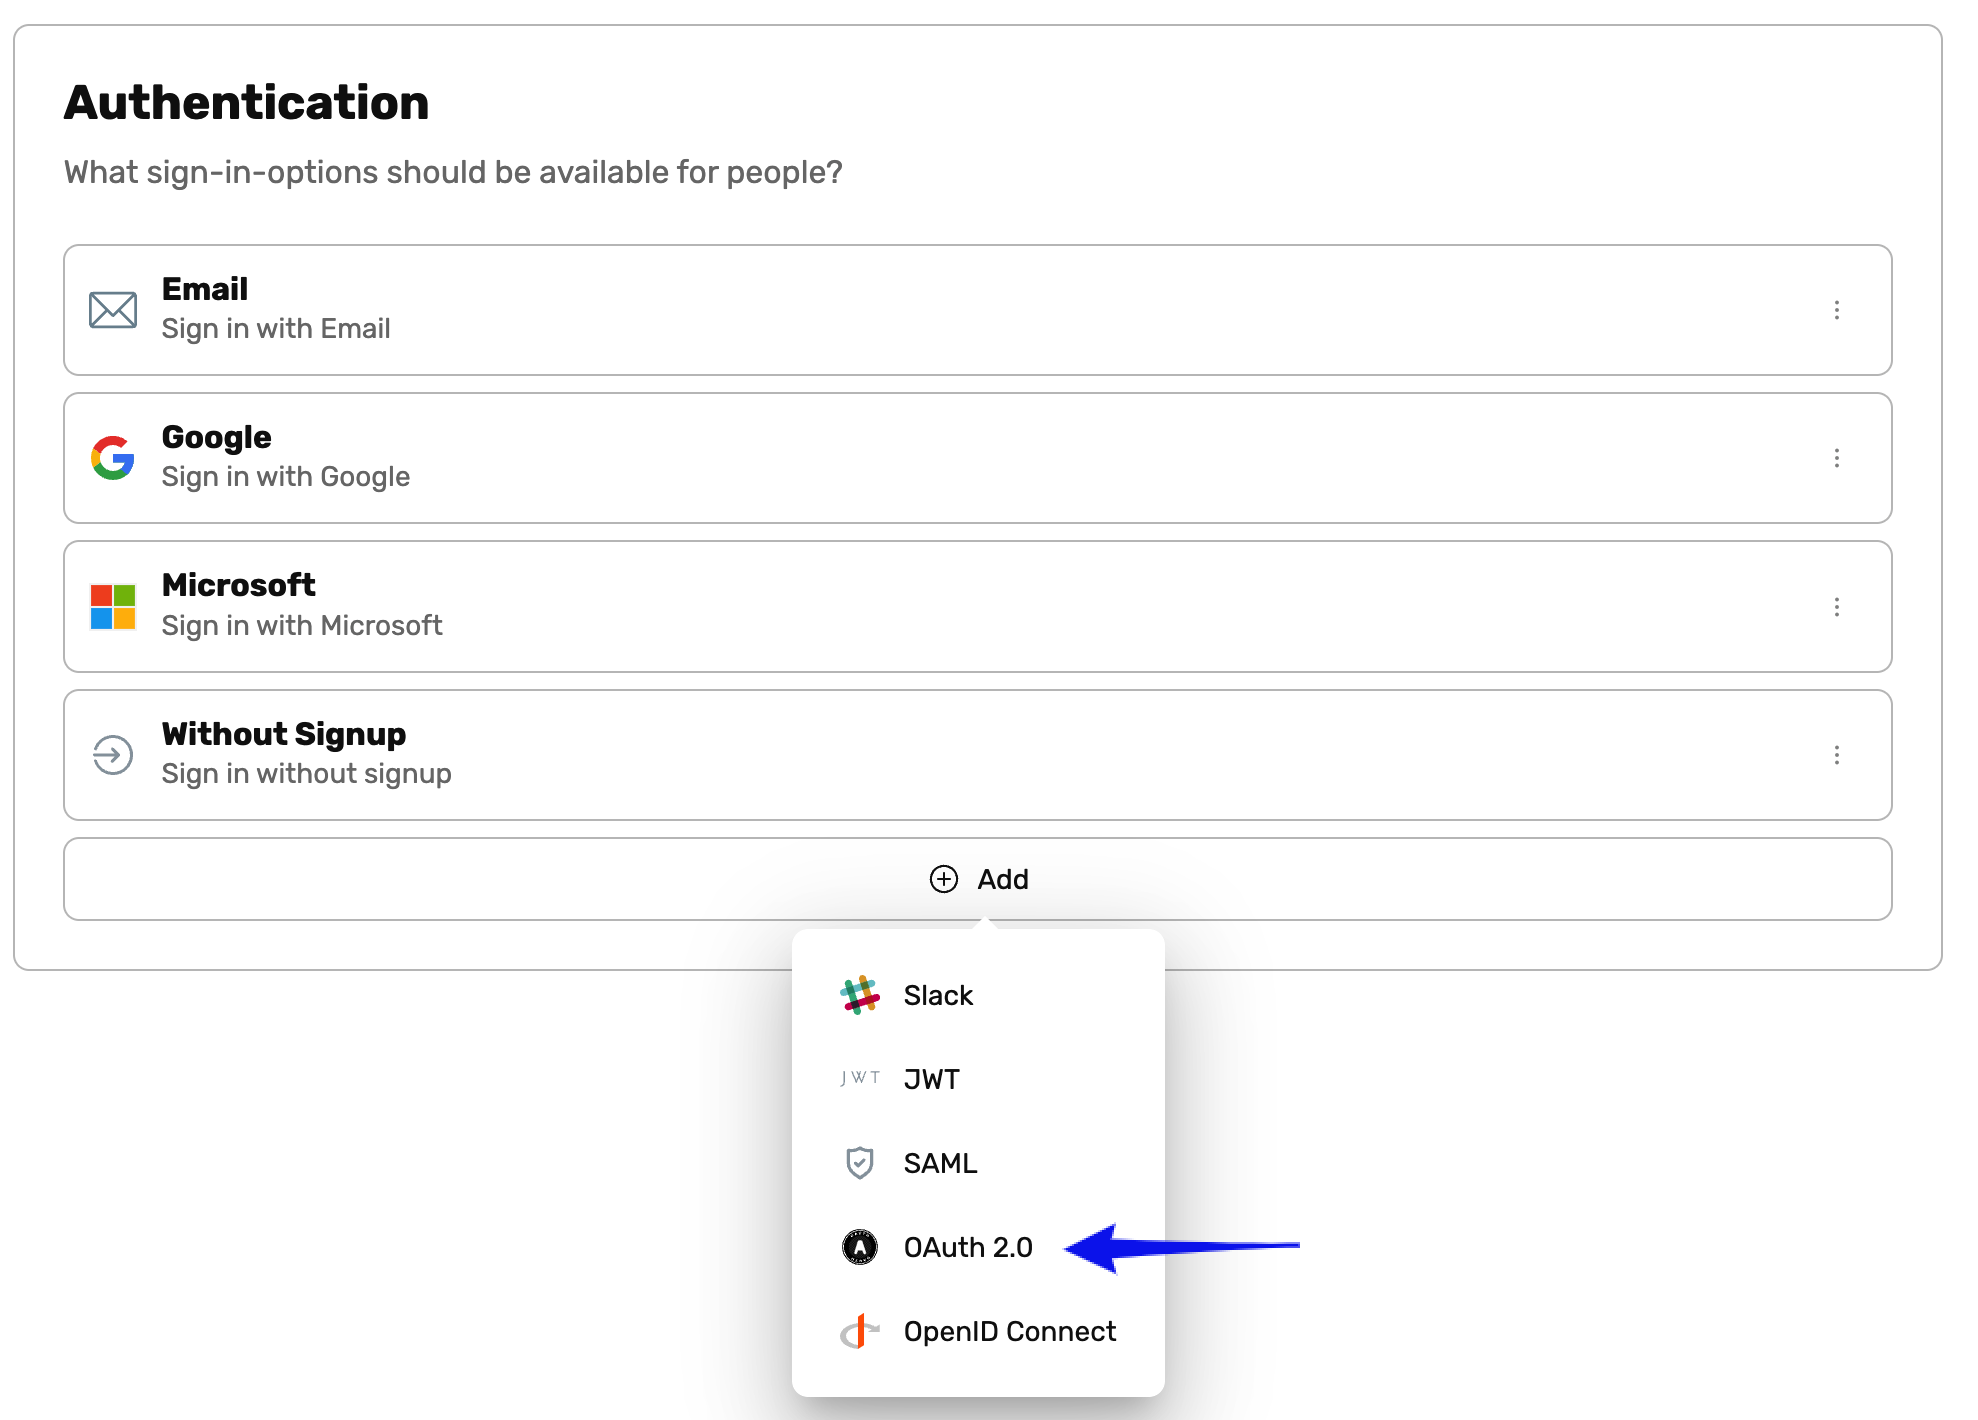
- In your Workspace navigate to the Settings then Authentication
- Click Add and chose OAuth 2.0
- Go through the Setup Dialog that appears

Authenticate with OAuth
Implementation Guide
OAuth 2.0 is the industry-standard protocol for authorization. OAuth 2.0 focuses on client developer simplicity while providing specific authorization flows for applications such as Ideanote.
Ideanote supports an OAuth 2.0 based Authorization Code Flow. This is the most common of the OAuth 2.0 grant types, and in relation to Ideanote, the flow goes roughly like this:
- Ideanote sends your user to a login screen you control (or integrate with), and that the user is already familiar with.
- The user enters their credentials and attempts to authenticate.
- If the credentials are valid, the user will be redirected back to Ideanote with an authorization code as a query parameter in the URL.
- Ideanote then exchanges this authorization code for an access token by communicating with your API.
- Using this access token as Authorization, Ideanote fetches some user info from your API, such as email address, id (or sub), avatar, prefered locale, and name.
If you want to dive into this in greater detail, this is a great resource on the topic.
Advantages
- An easy way to ensure strong authentication.
- Your users sign in through a system that they already trust, and they never share their credentials directly with Ideanote.
- As your users authenticate directly through your system (or a system you control), you'll maintain full control over who has access to your Ideanote workspace.
- OAuth 2.0 is an industry standard that you can use for authenticating with not just Ideanote, but thousands of software solutions.
Prerequisites
You will need to either:
- Already use a sign-in provider for your own system that has OAuth 2.0 support, such as Okta, Facebook, Google, Github, and many others. Or,
- Run an OAuth 2 authentication server yourself that conforms to the OAuth 2.0 specification
Important Note:
To get started with OAuth 2.0 based authentication, you will need to first consult the documentation of the sign-in provider you use for your system in order to create an OAuth integration or application through their interface.
You will need to copy a few things from there into the configuration on your Ideanote Workspace, and vice versa. We'll get to the specifics in a moment.
For your convenience, we've prepared a little list of direct links to the relevant documentation for some popular sign-in providers with OAuth 2.0 support below:
The way these typically work is some variation of the following: You create an OAuth application or integration. In there, you will see a Client ID and a Client Secret, as well as a list of OAuth scopes it supports. You will also be able to type in one or more Redirect URLs. Finally, you should see a list of relevant API endpoints such as the Authorization Endpoint and Token Endpoint.
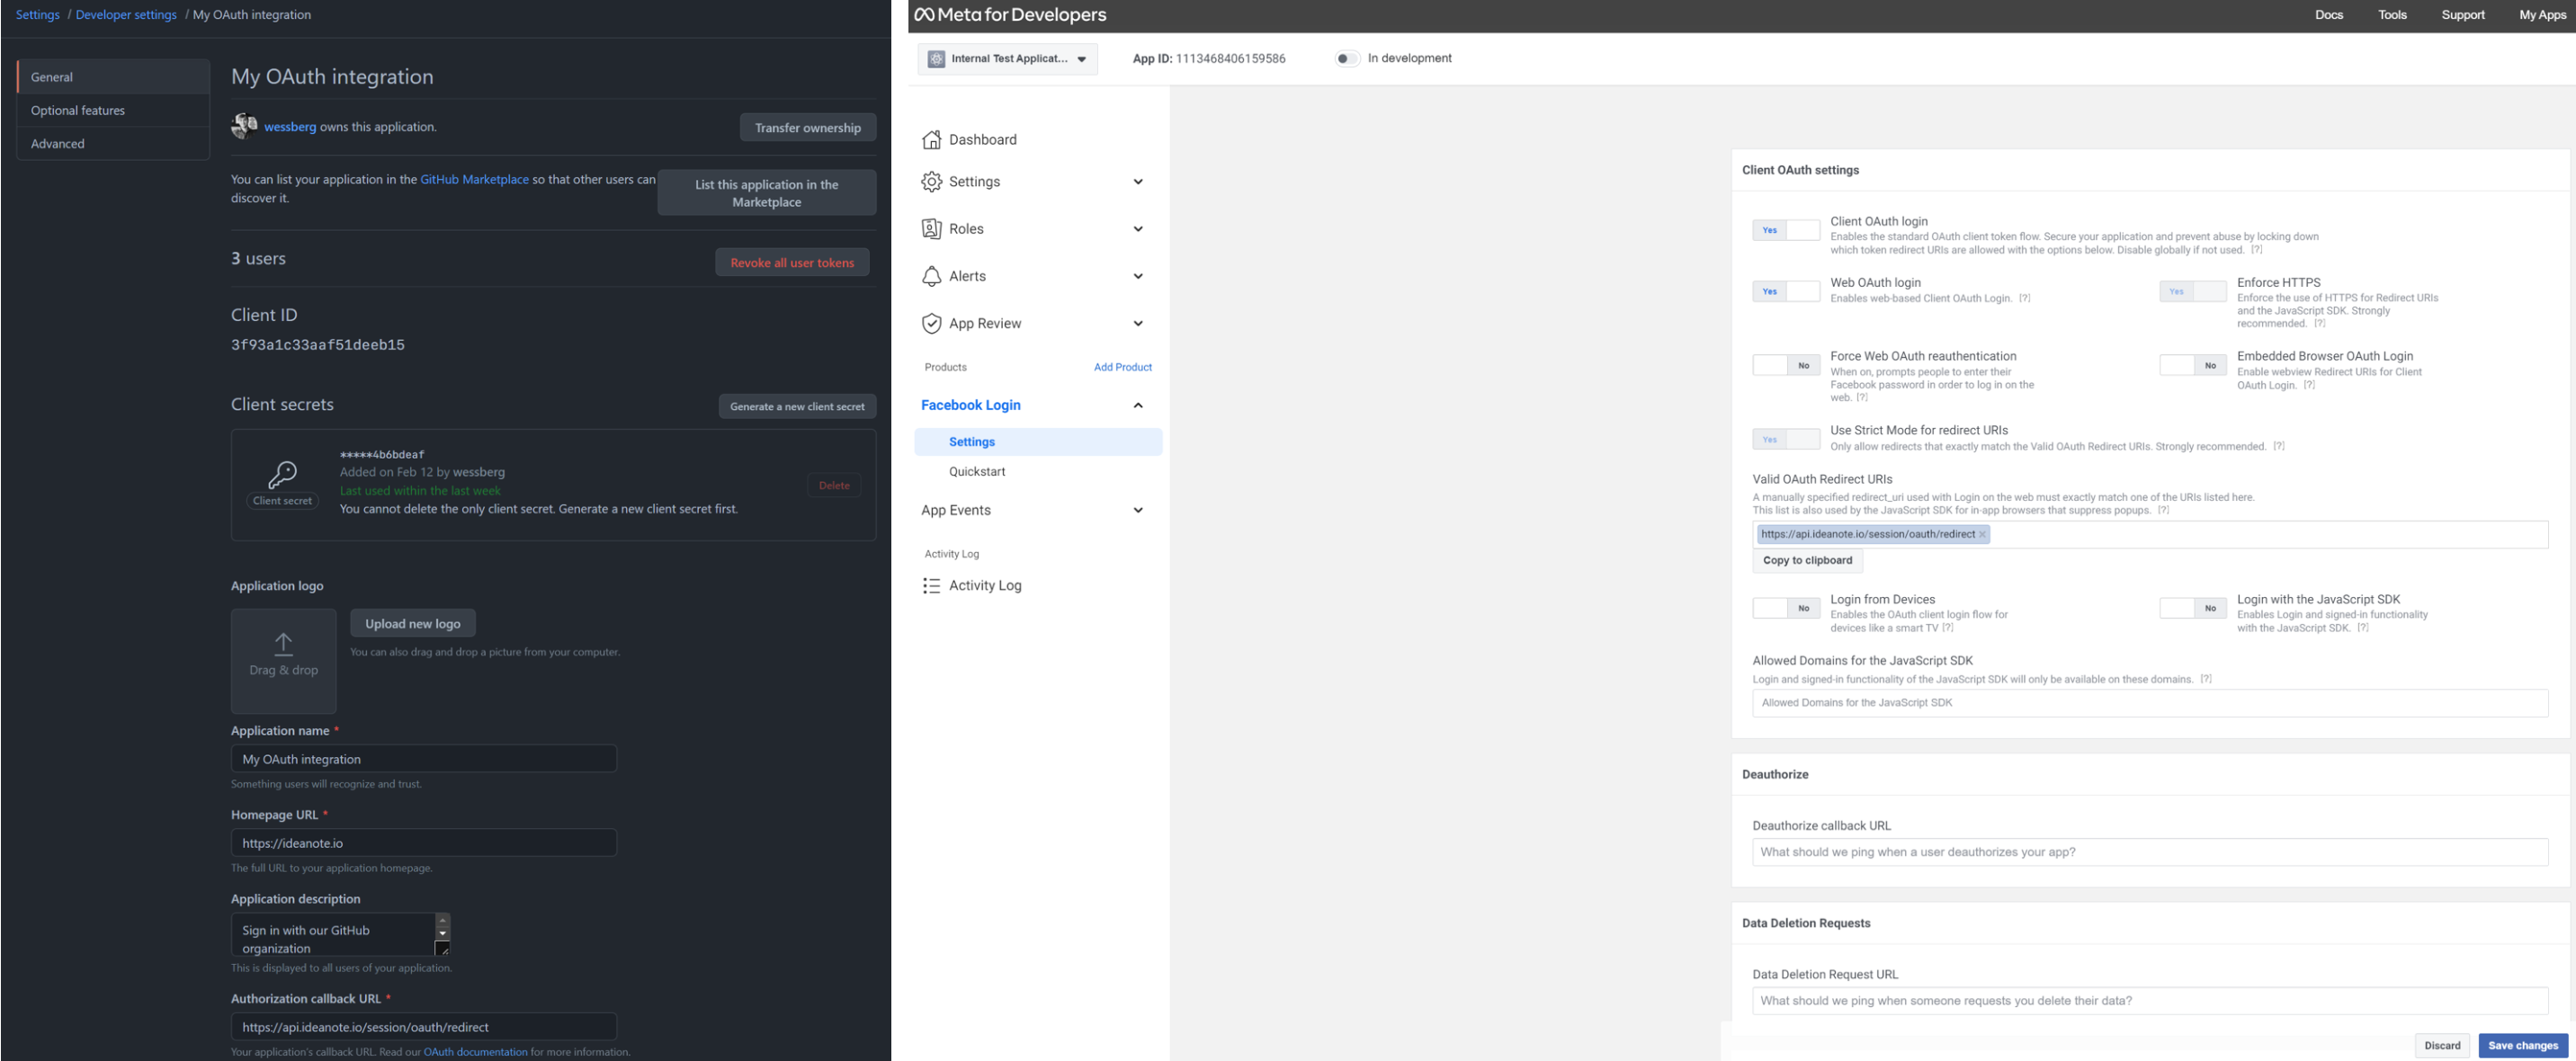
These images are examples of OAuth 2.0 integrations. The first one is from Github, and the second one is from Facebook/Meta.
When you have created an OAuth application/integration, or if you host your own OAuth 2.0 authorization server, you're now ready to move on to setting it up on your Ideanote workspace.
Configuring your Ideanote Workspace
Step 1
- In your Workspace navigate to the Settings then Authentication
- Click Add and chose OAuth 2.0
- Select your Sign-In Provider
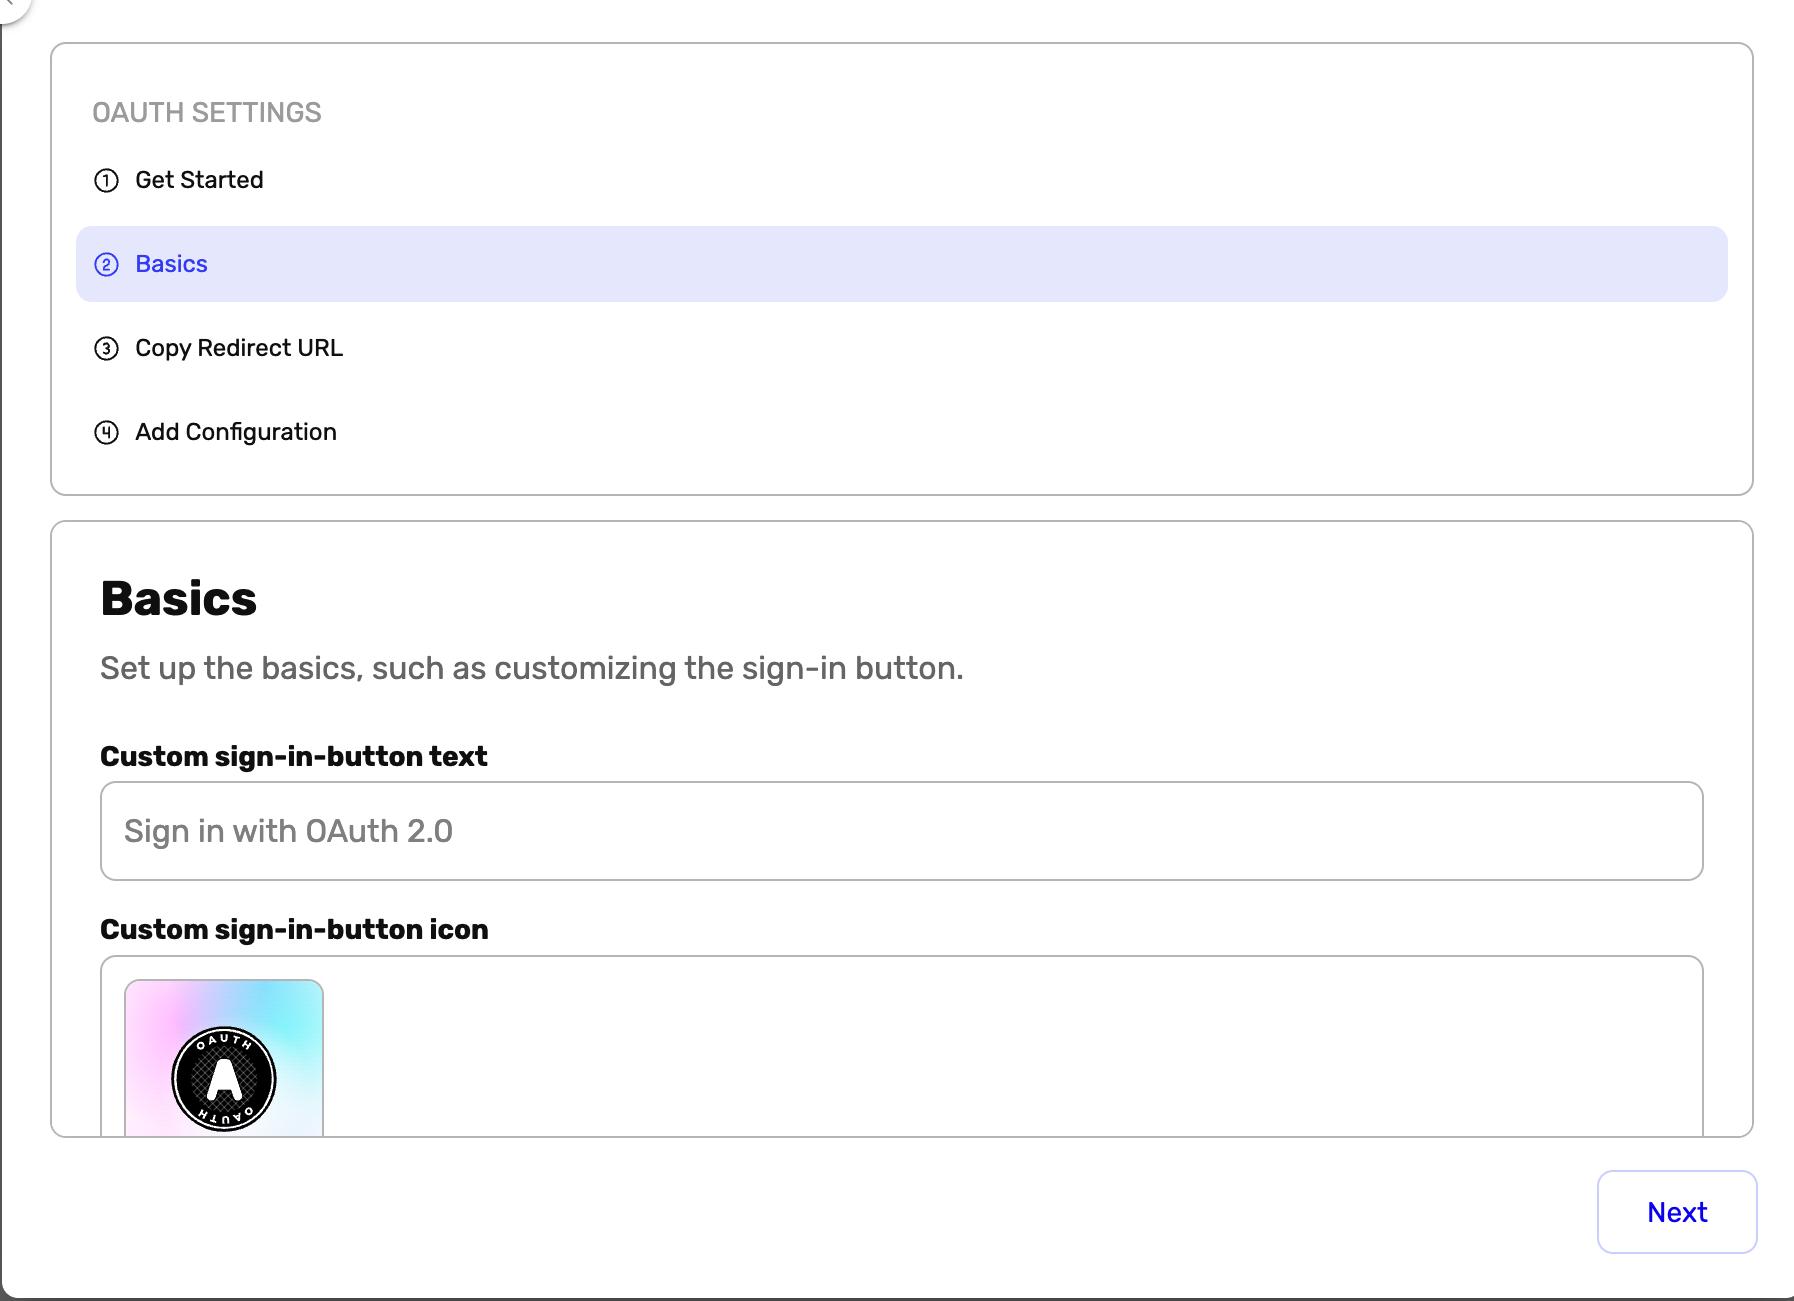
Step 2
- Go to Basics
- Configure and customize the general settings
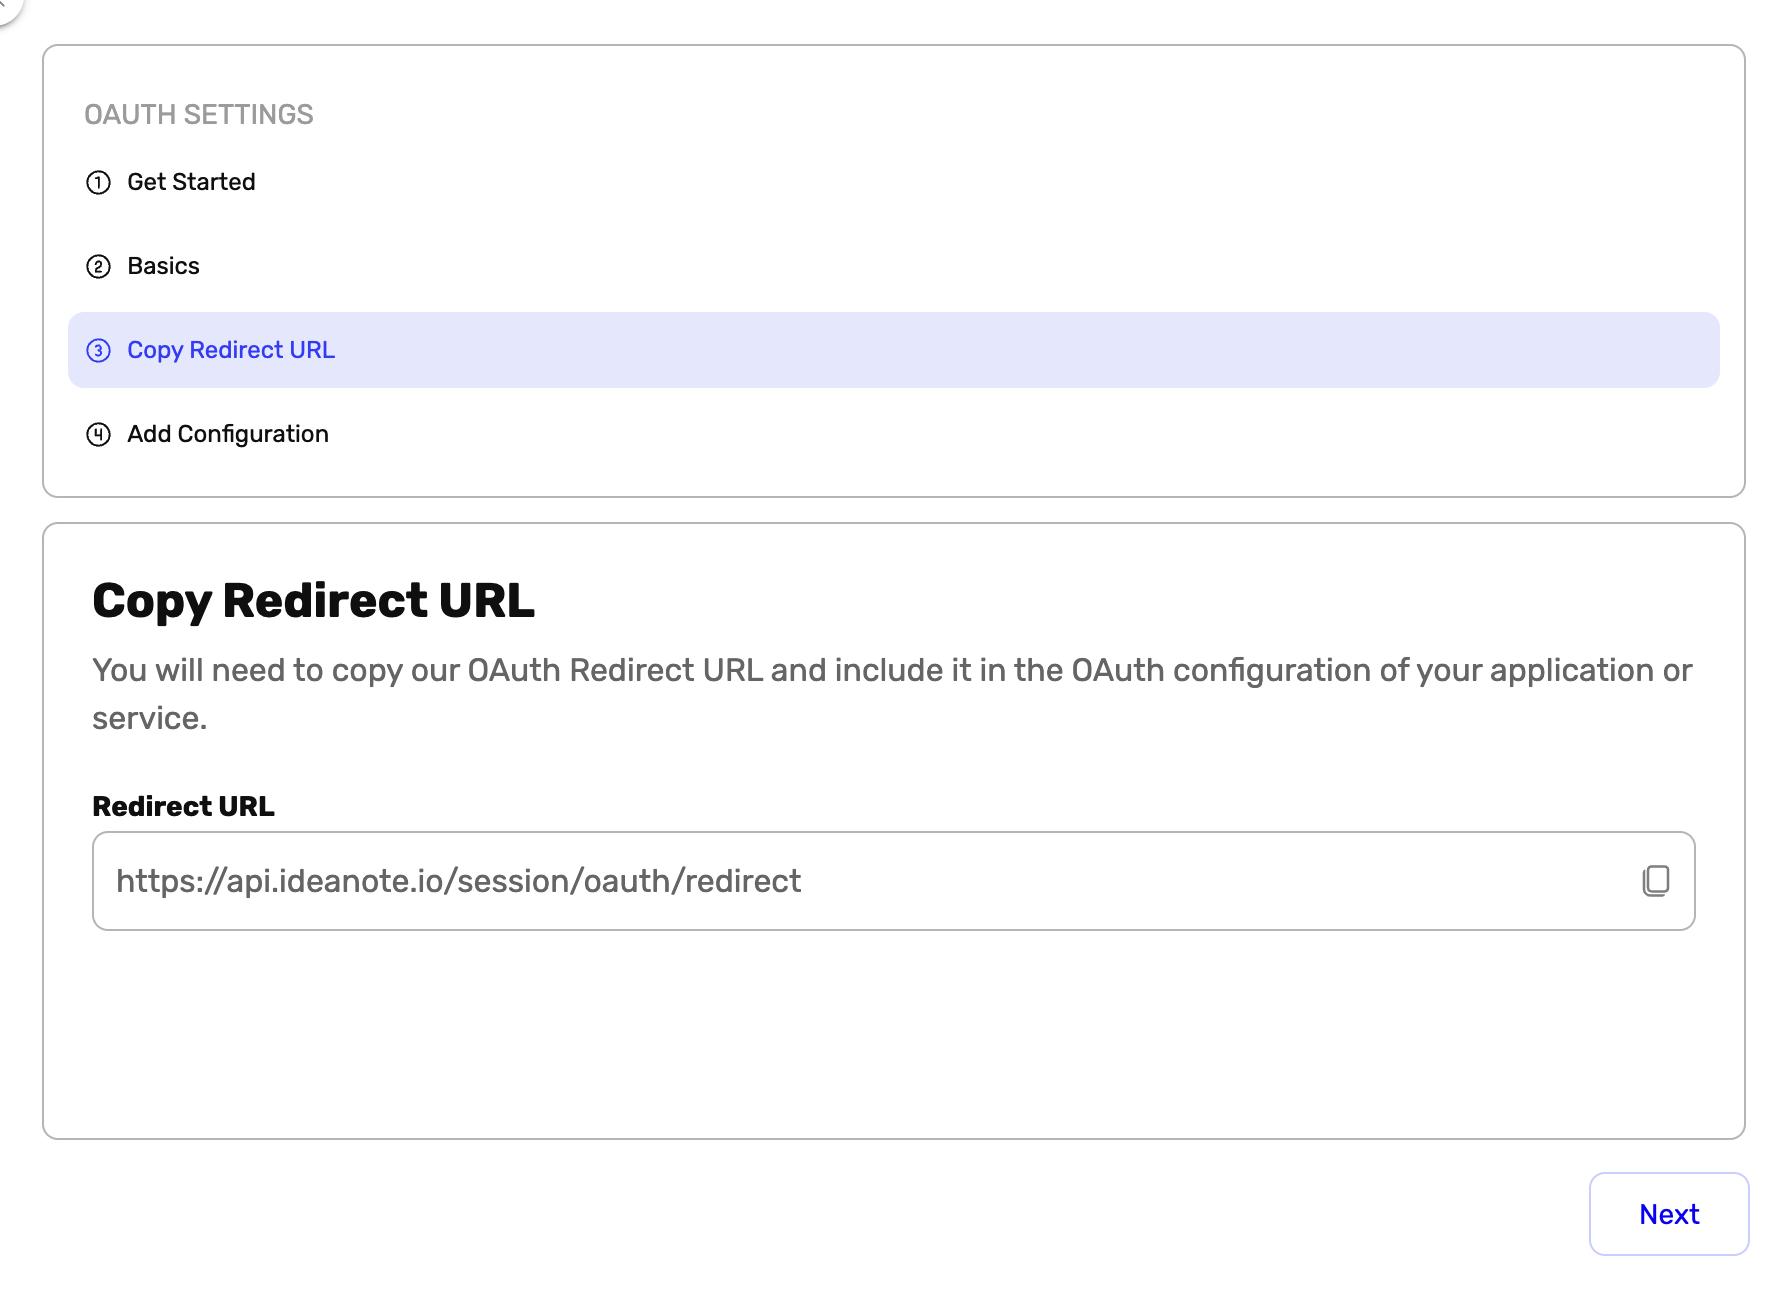
Step 3
- Go to Copy Redirect URL
- Copy the URL to your clipboard. This URL will need to be copied into the OAuth 2.0 configuration of your application/integration at the next step (Step 4)
Step 4
Before we can proceed with Step 4, let's do a quick check and revisit the high level functionality of an OAuth 2.0 Authorization Code Flow:
- When a user signs in via the login screen of your sign-in application, they will be redirected to some URL with an authorization code as a query parameter in the URL. That somewhere needs to be Ideanote's OAuth Redirect URL.
- When a user signs in via the login screen of your sign-in application, they will be redirected to some URL with an authorization code as a query parameter in the URL. That somewhere needs to be Ideanote's OAuth Redirect URL.
- As mentioned in the Step 3 section, you will need to copy the Ideanote Redirect URL into the OAuth 2.0 configuration of your application/integration.
- When you are confident that our Redirect URL has been added correctly, please click on Add Configuration and let's proceed.
Here we go for Step 4
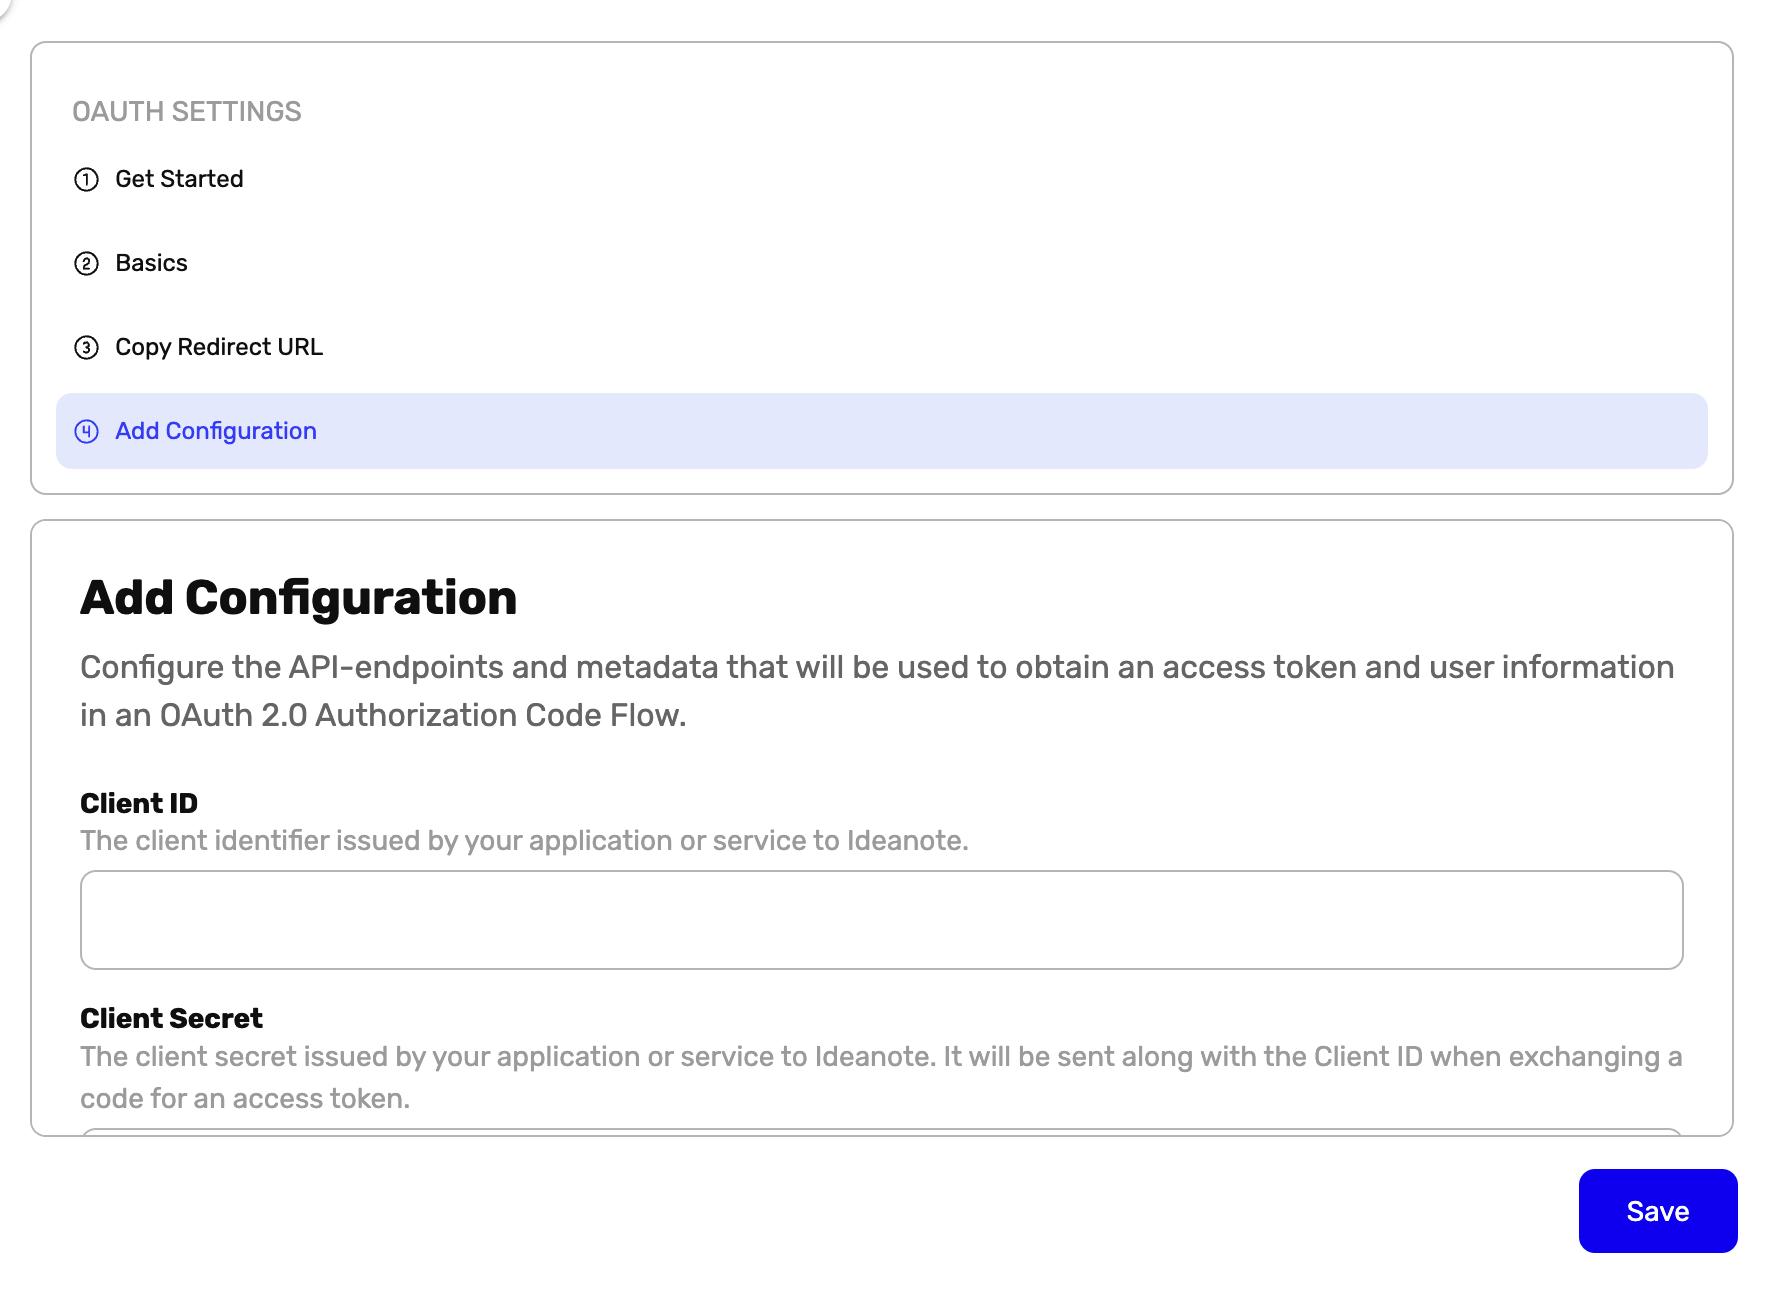
- Go to Add Configuration - This is where you can paste the relevant information from your OAuth 2 application/integration as described in the previous steps.
- This is where the Client ID must be entered. This is typically easily found somewhere in your OAuth 2.0 application/integration and is typically called Client ID or App ID.
- This is where the Client Secret must be entered. This is typically easily found somewhere in your OAuth 2.0 application/integration and is typically called Client Secret or App Secret. Note: If you're hosting your own OAuth 2.0 authorization server, you must ensure that it is sufficiently random to not be guessable. One way to do so is by using a cryptographically-secure library to generate a 256-bit value and then convert it to a hexadecimal representation.
- The Authorization Endpoint is the one Ideanote will send your users to such that they can authenticate with you before being redirected to us with an Authorization Code, - if everything goes well, that is. If you're not hosting your own OAuth 2.0 authorization server, you will be able to find this in the documentation of your OAuth 2.0 application/integration.
- The Token Endpoint is the one Ideanote will send the Authorization Code to we received from the Authorization Endpoint with the intent of exchanging it to an Access Token. If we get an access token back, we've successfully authenticated with your application/integration on behalf of the user. We'll use that access token one single time to retrieve some relevant user information, such as their id, email address, name, avatar, and potentially other information granted to us by the OAuth 2.0 scopes you'll enter
Additional Options
Available configuration options in Add Configuration.
- This is the API-endpoint Ideanote will invoke with the Access Token retrieved from the Token Endpoint as Authorization to retrieve relevant user information. This allows us to retrieve some of the required, as well as optional user information, including the id (or sub) and email address of the user (both of which are required), as well as optional data such as the name, avatar, preferred locale, and preferred alias. This endpoint can be found in the API documentation of your OAuth 2.0 application or integration.
- This is where you can enter the OAuth 2.0 scope(s) that should be requested. You must ensure that you enter at least one scope, and that the scope provides Ideanote with the two required data properties, which are email and id (or sub). Please consult the documentation of your OAuth 2.0 application/integration to read about the scopes they support and to ensure that Ideanote will request the correct scopes for getting access to user information, ideally including name and avatar as well.
- Ideanote expects the response from the User Info Endpoint you configured to be a JSON object. By default, Ideanote will attempt to parse and map its key-value pairs to user information based on guesses and heuristics. By expanding the USER INFO ATTRIBUTES accordion menu, you can help us out by specifying the exact path into the User Info JSON response we should look up for the individual user info attributes.
- When you have filled out all required fields and are satisfied with the configuration, you can click the Save button to save the OAuth 2.0 sign-in provider on your Ideanote workspace. Going forward, your users will see a new sign-in option on the Login page. If configured correctly, clicking it will take them to the login page they already use to sign in to your own system, and upon authenticating successfully, they will be redirected into your Ideanote workspace. Depending on the requested and accepted scopes, as well as what type of data your OAuth application/integration supports, Ideanote will already know some details about the user immediately, such as their name, avatar, preferred locale, and so on.
Useful Information
OAuth 2.0 is a well-documented and popular industry-standard protocol for authorization.
As such, there are many great resources available online, including in-depth guides and services that makes it easy to integrate OAuth 2.0-based authentication with your own API.
Here are a few resources we recommend:
The OAuth 2.0 Authorization Framework
What is the OAuth 2.0 Authorization Code Grant Type?
OAuth 2 Authorization Code Flow Playground
If you have additional questions, feel free to reach out to us at support@ideanote.io.
.svg)
